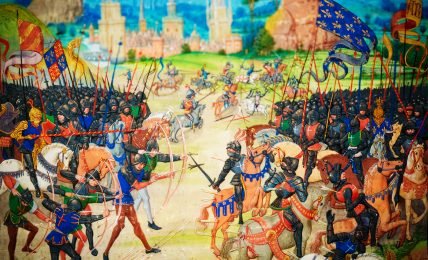
The Raid on St. Nazaire: A Mission of Sacrifice and Strategy
Learn how a single raid shaped the Atlantic war effort, denying Germany a strategic advantage and altering the course of WWII.

Learn how a single raid shaped the Atlantic war effort, denying Germany a strategic advantage and altering the course of WWII.
In 1941, as the threat of German invasion of Britain began to recede and the British considered taking the war to German-occupied France, a special raiding force was needed. With Churchill’s blessing, they were called commandos and became operational in February 1942. Units of commandos were soon to be employed in one of the most daring and violent raids of the Second World War – the attack on the French port of St Nazaire.
The Battle for the Atlantic – Britain’s supply lifeline to America – was hotting up. If the Germans could interdict this flow, perhaps Britain could be starved into submission. After the war, Churchill was to confess: “The only thing that ever really frightened me during the war was the U-boat peril.”
But the Germans were also cautious. They only had a handful of serious battleships to play with and the Royal Navy was a dangerous opponent. The only dry dock on the west coast of France capable of servicing and repairing battleships like the Bismarck and the Tirpitz was at St Nazaire. In 1941 the Bismarck was sunk trying to get to St Nazaire. The Tirpitz now skulked in a Norwegian fjord, posing a threat to Allied convoys to Russia. But if the Tirpitz could break out into the Atlantic, this would be worrying for the Allies.
So what could Britain do about the St Nazaire docks? The British examined options for putting the docks out of action. Bombing from the air was out – bombing was not so accurate at that time, nor could a sufficient payload of bombs be transported to completely destroy the docks. There were also concerns about civilian casualties. Naval bombardment was problematic – the Loire was difficult for heavy combat ships to negotiate, with gun batteries lining the shores. Sabotage – perhaps commandos or secret agents – could not carry enough explosives.

Slowly a plan emerged – Operation Chariot – bringing elements of previously discussed ideas into a truly joint operation. The mission was given to the Combined Operations headquarters under Lord Louis Mountbatten. It was beyond daring. An old destroyer would be packed with explosives and rammed into the docks. Motor launches and gunboats would give covering fire while landing a group of 250 commandos that would destroy as many installations as possible. Intelligence information was gathered from a range of sources, regarding the structure of the docks, its weaknesses, the weather, the tides and the enemy forces. In 1940, during the fall of France, a British Royal Engineer officer had investigated how best to demolish French docks. He had actually studied St Nazaire. Intelligence gathered information on the locations of German minefields and recognition signals. The commandos trained intensively on street fighting and demolition.
The tides would be unusually high in March 1942. This allowed ships to access less well defended areas of the Loire estuary. The RAF would contribute an air raid to keep the attention of the Germans focused upwards and off the river.
They found an old destroyer – the HMS Campbeltown (formerly the USS Buchanan, sent by America to Britain in 1940). It was stripped of its turrets and internal compartments to make it lighter. Additional armor plating was added to the bridge and wheelhouse and 20mm rapid firing Oerlikon guns were added to the sides. Two of its four funnels were removed and the other cut to imitate a German destroyer. It was then loaded with four tons of high explosive to be triggered by a timed fuse. Two other destroyers would accompany the raiding fleet across the dangerous route to St Nazaire. The motor launches were up gunned and given extra fuel tanks.

The overall commander of the naval component was Commander Robert Ryder, the leader of the commando operation was Lieutenant Colonel Charles Newman and the captain of the Campbeltown was Lieutenant Commander Stephen Beattie. One would return to England and two would be taken prisoner. They would all receive the Victoria Cross, Britain’s highest military award.
German defenses were inevitably strong, given the importance of the target. Five thousand soldiers were garrisoned in and around the town, along with an anti-aircraft brigade of 40 guns, supported by searchlights and a naval artillery battalion of thirty guns to defend the river.
Everything would depend upon speed and surprise.
The small armada – three destroyers and sixteen motor launches – set off from Falmouth docks in the afternoon of 26 March for the six hundred kilometer haul south. There were a couple of scares along the way. They bumped into two unfortunate French fishing trawlers, who were taken prisoner and their ships sunk in order to avoid information leaking out. The profuse apologies offered by the Royal Navy were met with a shrug and a “c’est la guerre” from a phlegmatic trawler captain. But there were more serious worries. Five German torpedo boats were reported in the area. These German boats were powerful beasts – almost equivalent to the British destroyers. Later, the British were sighted by a German submarine, the U-593, who reported them. But at the time, the British were moving south and not considered a direct threat.
The last waypoint before the approach to attack was reached. The two destroyers bade good luck to the Campbeltown and the motor launches. The Campbeltown raised a German naval flag and headed into the Loire estuary, which got narrower with each passing kilometer.
The RAF bombed St Nazaire near midnight. The cloud cover hampered bombing and the five squadrons had instructions to drop bombs singly and to hit only military targets. This activity was considered unusual by the German anti-aircraft commander. He wondered if a parachute attack was coming. A lookout boat in the estuary reported sea activity. The German garrison was alerted and made ready.

After midnight, the Campbeltown scraped over the mudflats and shoals. At 01.22 on the morning of the 28th, close to the docks, German searchlights lit up and challenged the Campbeltown. A few confused codewords were exchanged, buying a little more time for the British. A burst of fire came from the shore. Cleverly, the Campbeltown signaled that a friendly ship was being fired on. More confusion on the German side as the Campbeltown raised the Royal Naval ensign and accelerated towards the docks at top speed. Other accompanying motor launches started to fire back.
More searchlights caught the Campbeltown in a blinding cone of light. German guns opened up and the old destroyer was assailed with metal. The volume of fire intensified on all sides. At 01.34, the Campbelltown crashed into the dock gates so hard that it penetrated ten meters through the gate, pushing the ship upwards at an awkward angle.
The commandos on the Campbelltown leapt out, keen to get away from this natural target. They had one hour in which to wreak havoc. The motor launches landed their troops and provided covering fire as intense firefights broke out around the dock installations between the German garrison and the commandos.

It soon became apparent that the motor launches – primarily wooden and fueled with highly flammable petrol – were suffering a battering so close to the shore. Eight were burning or sunk. Colonel Newman, with his commandos, saw there would not be enough capacity to re-embark much of his force. With an isolated group of 100 fighters and ammunition running low he instructed them to break out through the narrow streets of the town if possible and head for Spain. Many were taken prisoner (but incredibly, five actually made it to Spain and then back to England).
The remnants of the flotilla retreated under heavy fire. They met up with the destroyers and headed for Falmouth. Others missed the rendezvous and made their own way, avoiding air attacks (a motor launch actually managed to shoot down a German Ju-88 bomber) and torpedo boats.

The Campbeltown failed to explode at the planned time. As weary British prisoners were being interrogated in the St Nazaire garrison, the wrecked Campbeltown became a major sightseeing attraction for the German garrison, who swarmed over it for photo opportunities and the possibility of loot. A disappointed Beattie, during his questioning, was taunted by the Germans who were dismissive of the damage caused by the Campbeltown.
At midday on the 28th, the Campbeltown finally exploded, destroying the docks (they were not to be repaired until 1948) and killing 350 Germans. Body parts were hurled across the town.
The cost for the British had been high – 169 killed and many prisoners. Only a third of the 600 Royal Navy and commando participants made it back to Falmouth. But it was a major propaganda victory and a strategic blow to the aspirations of the German navy. Hitler was furious.
There are a couple of postscripts to the raid. In the afternoon of 30 March, German construction workers were caught in a blast when a delayed action Royal Navy torpedo exploded in a dock gate. In the smoke and confusion, the fleeing laborers were mistaken for commandos by the jumpy garrison and shot at. Civilians were also killed as the Germans combed the streets for phantom raiders.
Later that year, at a prisoner of war camp near Bremen, the German camp commandant magnanimously held a special ceremony for Captain Beattie, announcing the news of Beattie’s award of the Victoria Cross and reading the citation in front of the entire prisoner camp.